Workflow: a workshop job, from enquiry to customer pick-up
Every step of a workshop job in order: the enquiry, the customer and their car, the quote, approval, booking, parts, check-in, the work, QC, invoice, payment and pick-up, with a link to each step's guide.
Where it is
- CRM → Inbox — Where texts, chats and messages arrive
- Sales → Quotes
- Workshop → Jobs
Settings for this
- Settings → Modules & flow — An accepted Service & Repair quote becomes a workshop job
- Settings → Orders — Turn accepted quotes into jobs and orders by themselves
- Settings → Workshop — Technicians, bays, labour rates, trading hours, checklists
- Integrations → Customer notifications — Booking confirmation and job-ready texts
- Integrations → Stripe — Card deposits and Pay now
The whole journey of a workshop job, in the order it happens. Each step has a button to the page where you do it and a link to its full guide. In BuildTrack's Help panel, when a button takes you to a page, Back to the guide (bottom right of the screen) brings you straight back here.
A walk-in can skip the quote (go from step 2 to step 5). A request from your online booking page skips to step 8.
Set up once before your first job: Workshop settings (technicians, bays, labour rate, trading hours), Which way a sale goes, and Automatic customer texts.
1. The enquiry comes in
- A text, website chat, Messenger or Instagram message lands in CRM → Inbox. Reply, assign it, and it can create the contact for you. See The Inbox.
- A website form shows in Forms → Submissions and creates or updates the contact. See Build a form.
- A request from your online booking page waits in Workshop → Booking requests. Confirm it; when the car arrives, Check in makes the job (go to step 8). See Booking requests.
- A phone call or walk-in: go to step 2.
2. Create the customer and their vehicle
- Search CRM → Contacts first, then + New Contact if they're new. You need an email to send documents and a mobile to text them. See Create a contact. (You can also add them from the quote's Customer box with + Add new customer.)
- Add their vehicle on the contact; rego lookup and VIN decode fill it in. See Customer vehicles.
- A fleet or trade customer? Create the company and link the contact to it, so its price tier and terms apply. See Companies.
3. Quote the work
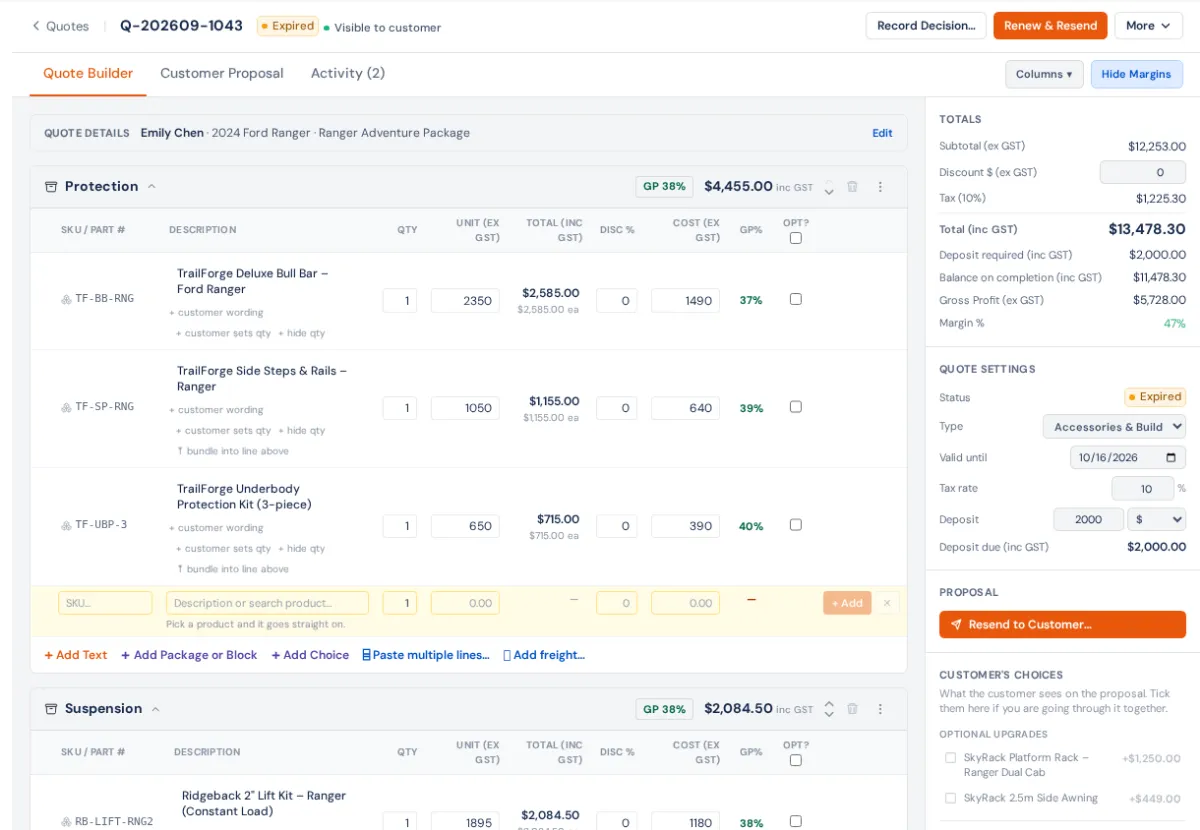
- Open Sales → Quotes and press New quote, or start from a quote template.
- Set the quote's Type to Service & Repair. That's what makes it a workshop job when it's accepted (the default, Accessories & Build, makes a sales order).
- Add the parts and labour. Standard services come from Canned jobs; options, bundles and hidden quantities are in Quote lines and options. Found the work in an inspection? See Turning findings into a quote.
- Want a deposit? Set it on the quote. See Deposits and payments.
- Send it by email, SMS or both. See Create and send a quote.
4. The customer approves
They open the link, pick their options, sign, and pay the deposit by card if you take cards. A yes by phone is recorded on the quote. See Online approval. Gone quiet? Quote follow-ups. Options they left out go to Deferred work for later.
5. It becomes a job
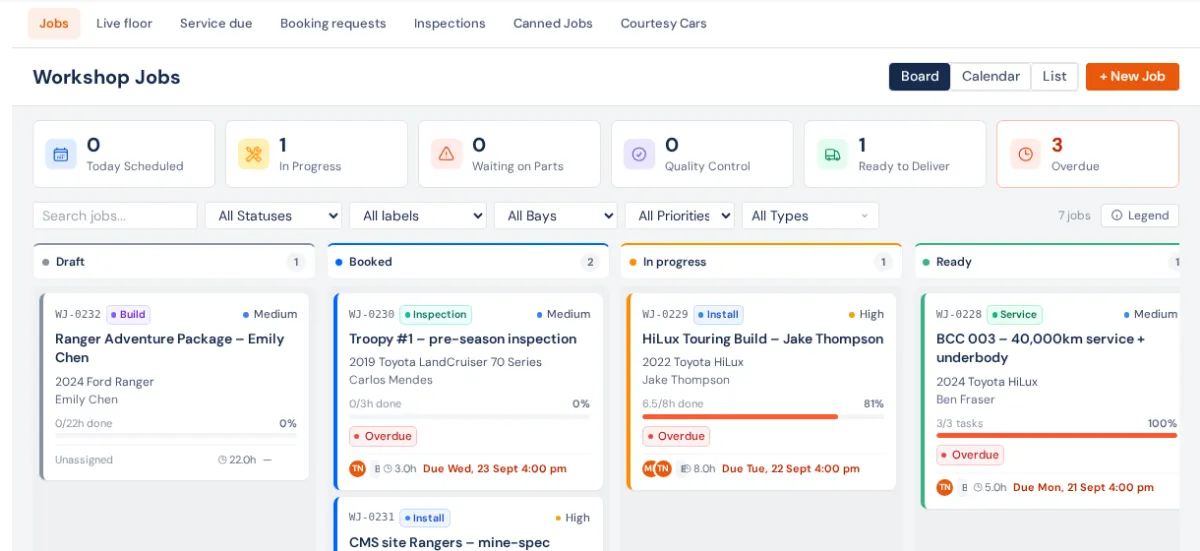
With Turn accepted quotes into orders on in Settings → Orders (on by default), the job is made a few minutes after they accept, with a sales order behind it that holds the parts and the deposit. Otherwise press Create Workshop Job on the quote. See Which way a sale goes.
No quote? Workshop → Jobs → + New Job.
6. Book it in
Set Scheduled Start and Promised to customer, choose the bay and technician, or let ✨ Smart Schedule find a slot. BuildTrack offers to Send booking confirmation. See Create and book a workshop job and Scheduling and the workshop board. Need a loan car? Courtesy cars.
7. Get the parts in
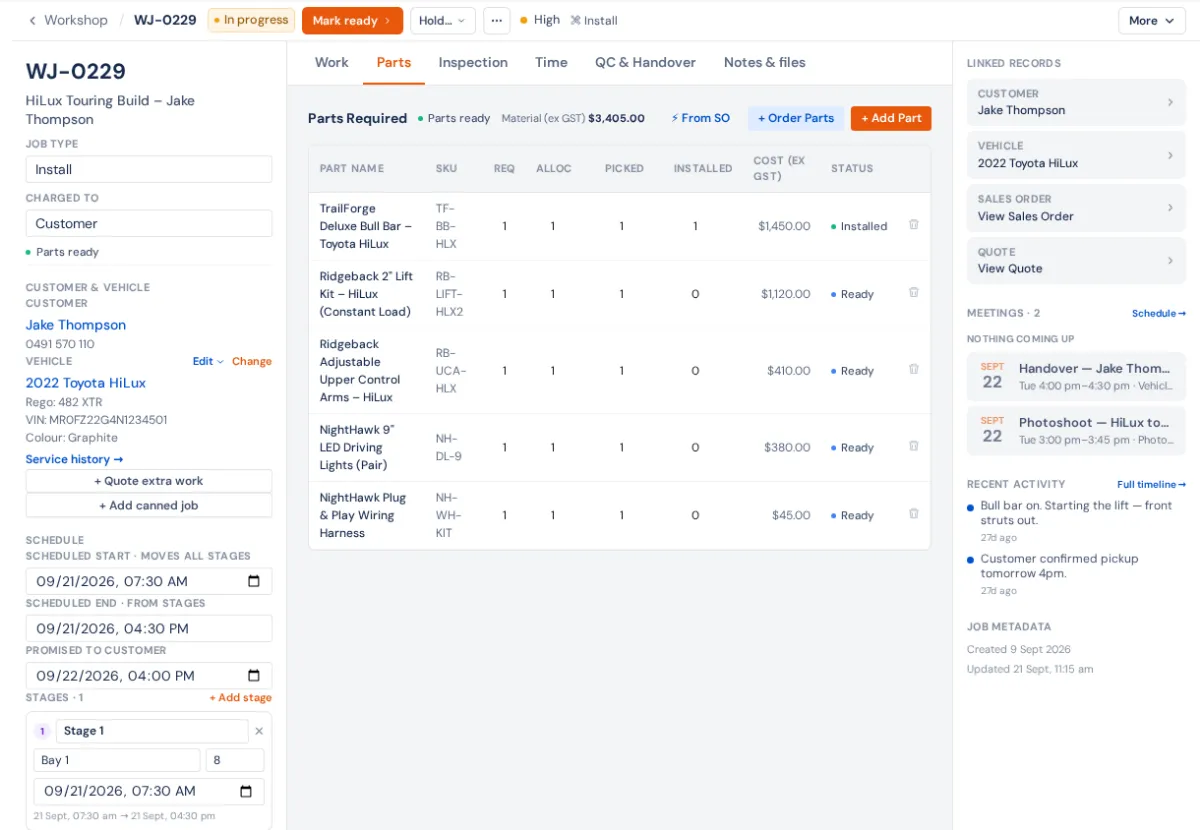
The job's Parts tab shows what's held and what's short; + Order Parts puts the shortfall on a purchase order. See Parts on a job. Send and receive the PO: Raise, send and receive a PO and Receive a purchase order. Watch it on Orders desk → In the workshop. Sending the car out for an alignment or paint? External services.
8. The car arrives: check it in
Photos all round, existing damage, odometer and fuel, the check-in checklist and the customer's signature. See Check a vehicle in. From a booking request, Check in on the request makes the job first.
9. Do the work
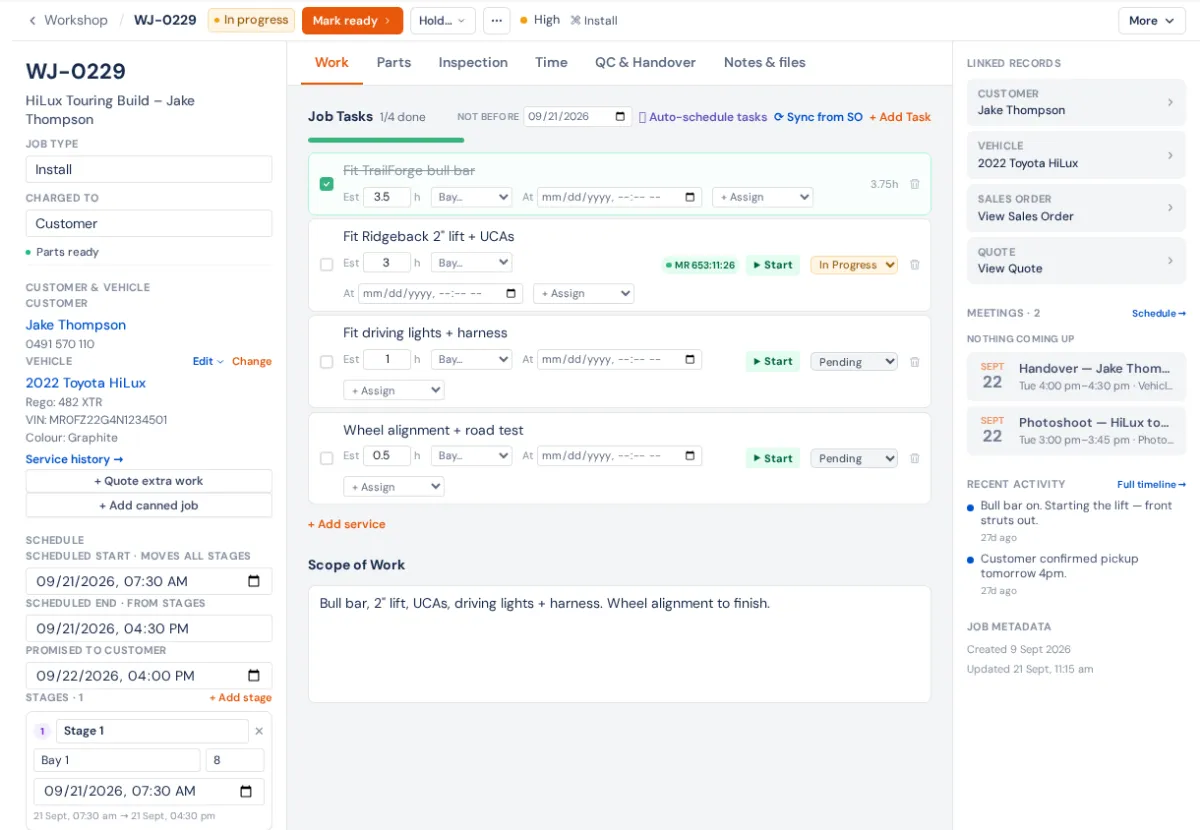
Press Start work. Technicians clock onto each line on the Work tab, on a computer or their phone. See Labour clocking and The technician phone view.
- Doing a digital inspection? Digital inspections.
- Work stopped (waiting on parts or the customer)? Hold… with a reason. See Holds.
- Found more work? + Quote extra work; once they approve, it's added to this job. See Extra work found on the job.
- Keep the customer in the loop with photos: Share build progress.
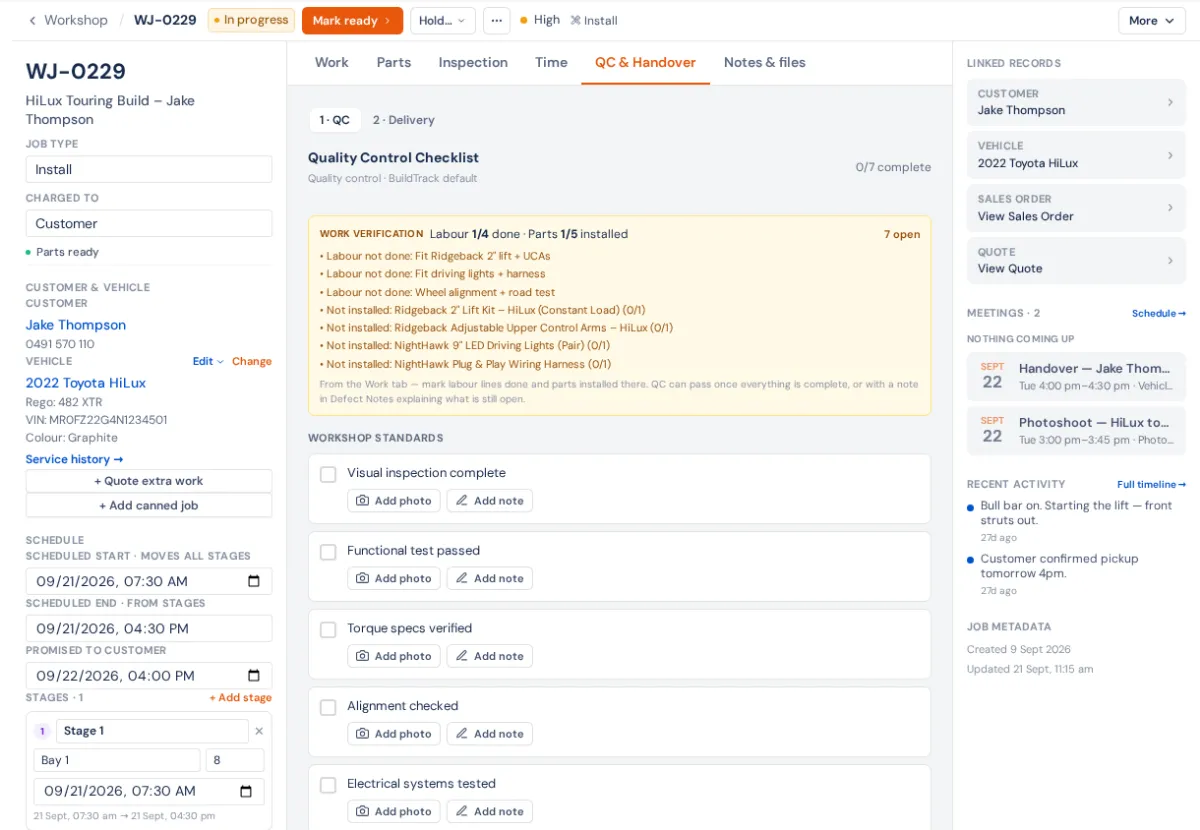
10. QC, then mark it ready
On QC & Handover, work through 1 · QC and 2 · Delivery, then Mark ready. See QC and handover checks.
11. Invoice it and tell the customer
- Raise invoice on the job (not on the Invoices page, or hand-over can't find it). Check it and Approve Invoice; any deposit comes off. See Invoice, hand over and close.
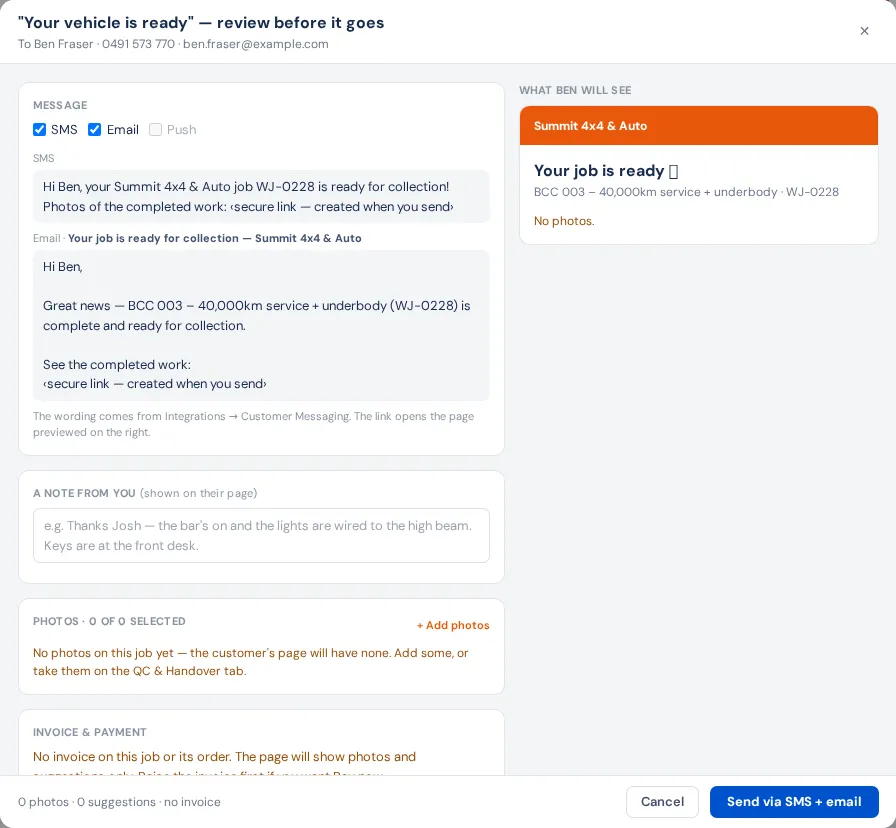
- Notify customer — ready sends one message with photos of the work, the invoice and a Pay now button. See Tell the customer it's ready.
12. Get paid
A card payment from the ready link goes onto the invoice by itself. At the counter, Record Payment on the invoice. Or send a pay link. See Take and record payments and Pay links. Xero gets the invoice and payment: Xero.
13. The customer picks up
Press Hand over on the job. That takes the parts out of stock and completes the sales order. Then Close job. Take back any courtesy car. See Invoice, hand over and close.
14. Afterwards
- A Google review: Ask for reviews.
- The next service and rego: Service and rego reminders and Service due.
- The upgrades they said no to: Deferred work.
- Still unpaid: Payment reminders.
Prefer to learn it properly? The Workshop course and Sale to job course in the Academy cover this with quizzes and badges.